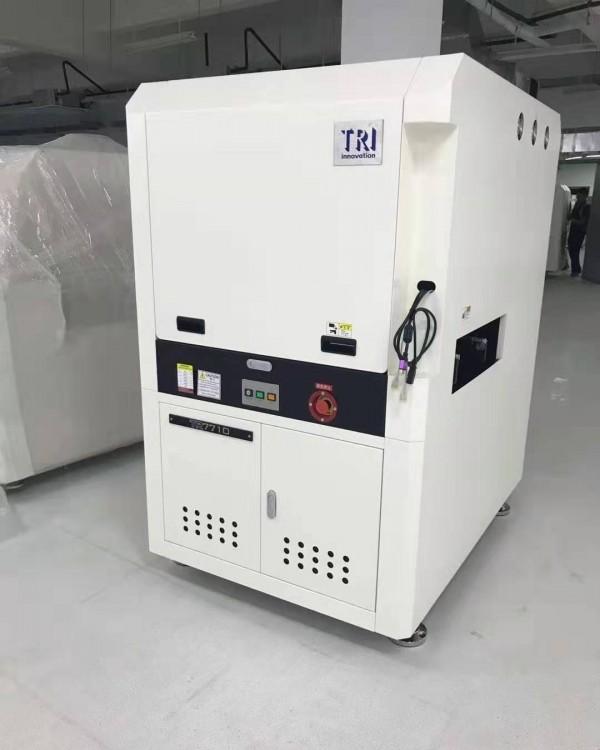
The TR7710 combines an accurate high-resolution camera system and TRI's unique multi-phase light source to capture fine PCB images. The new optical solution aims at higher component detection, and provides multiple gap heights for selection to improve the depth of field range. TRI's third-generation AOI compatibility detection software combines excellent defect detection and simple intelligent CAD programming design, and is a cost-effective AOI solution that can be customized with multiple budgets.
• Economical and settable online AIO
• 65000 pixel color camera with up viewing angle
• Easy programming and smart component library
• Walk stop inspection with large depth of field
• 10 µ M or 12.5µ M's system solution

Delu TR7710
Product Description
1. New structure and sufficient security guarantee
2. Fast programming and debugging integration, more convenient and fast operation
3. PCB automatic recognition and 180 degree reverse automatic recognition system
4. Intelligent camera bar code recognition system (can recognize one-dimensional code and two-dimensional code)
5. Professional SPC analysis system, constantly monitoring and analyzing product quality
6. Multi line monitoring system makes the production status of all production lines clear at a glance
7. The remote programming and debugging control functions are used together, and the software control performance is stronger
8. By extracting the micro color of the captured image and setting the area weight ratio of the micro color according to the standard template, the image is analyzed and processed to achieve the detection target
9. The test result report integrates some contents of SPC, shows the rate and distribution of defective products according to the actual test situation, and refreshes the relevant information such as the test quantity, defective rate, misjudgment rate of products in real time. The operator with the right of use has a clear view of the defective situation of the production line and products at a glance. 10 The professional SPC analysis report conducts macro-control on the entire production process, promotes the improvement of the defective products of the production line, reduces the incidence of defective products, and improves the production efficiency.
1、 Visual recognition system
1. Discrimination method: combined with weight imaging data difference analysis technology, color image contrast, color extraction analysis technology, similarity, binarization, OCR/OCV, path testing and other algorithms
2. Camera: CCD color camera resolution: 12/15/20 μ m/point, optional
3. Light source: RGB ring LED structure light source
4. Image processing speed: 0201 element<10ms, processing time of each picture<170ms
5. Detection content: a. Solder paste printing: presence or absence, deflection, less tin but more tin, open circuit, pollution
b. Parts defects: missing parts, offset, skew, stele, side standing, turnover, reverse polarity, wrong parts, damage
c. Solder joint defects: more tin, less tin, continuous tin
d. Wave soldering detection: less tin, more tin, solder bridging or short circuit, faulty soldering, cavity
6. Anti static measures: anti-static socket with anti-static ring
2、 Mechanical system
PCB size: 25MM× 25MM~340MM× 480<<(larger specifications can be customized according to the specific requirements of customers)
PCB thickness: 0.5MM~2.5MM
PCB warpage lt; 2MM (with fixture to help correct deformation) (customized for special requirements)
Part height: Top ≤ 25MM, Bottom ≤ 70MM (customized for special requirements)
*Small parts: 0201 element
10. Y platform: 1. AC servo motor system of driving equipment
2. Positioning lt; 20 microns
3. Moving speed 700 mm/s (MAX)
3、 Software system
Operating system: Microsoft Windows XP Professional
Identification control system: apply weight image difference modeling technology and unique color, extract analysis technology, learn ok samples, automatically establish standard images, identify data and error thresholds, graphical programming, built-in component library, automatically generate test frames according to component shape selection standards, automatic positioning, micro bit fine adjustment, and fast manufacturing process
Mark: 2 commonly used mark points can be selected. Multi mark function recognition speed: 0.3 seconds/piece
4、 Control system
1. Computer host: industrial control computer, Intel quad core CPU, 2G DDR III memory, 500G hard disk
2. Display: 22 inch LCD wide screen display
5、 Other parameters
1. Boundary dimension: (L * W * H) 900× 1080× 1340mm
2. Weight: about 450kg
3. Power supply: AC 220V± 10%, frequency 50/60Hz, rated power 600W, with UPS.

